HOW TO SUCCESSFULLY LAY CERAMIC FLOORS?
The first thing to do is to analyze the possibilities and requirements of your space to determine the most suitable type of ceramic coating. With SARCERAM collections that imitate marble, natural stone or concrete, you can design larger and brighter spaces without having to modify their original structure.
Non-slip flooring: Non-slip ceramic flooring makes spaces safer. This is particularly the case in outdoor areas where water and humidity are more likely to accumulate.
The marble collections also stand out for their great solidity, especially the lines of the YUKON collection, whose pure white makes each space unique.
In order to lay SARCERAM ceramic floors properly, here are the tools you need for each step:
- Spirit level. It is imperative to check that the surface you are working on is properly leveled.
- Metre. To measure the dimensions of ceramic pieces and check their correct positioning.
- Tile cutter. The manual version for individuals will allow you to cut the ceramic pieces to the exact measurements of the space.
- Sponge. To clean excess glue between tiles.
- Jointing materials: Use the jointing material recommended by SARCERAM and apply it using a rubber trowel in order to avoid the formation of bubbles, cracks or holes.
- Self-leveling spacers to ensure proper leveling and separation of tiles.
- Rubber trowel for applying grouting material.
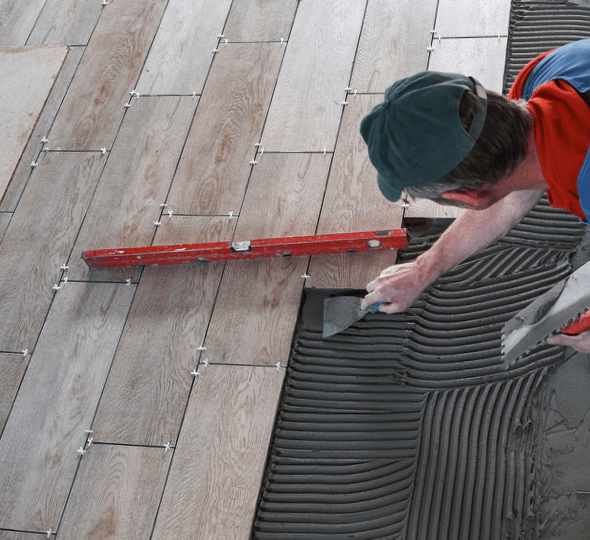
- Notched trowel for laying the glue.
Although we recommend that the laying of ceramic floor tiles be carried out with the help of an experienced professional, you can do it yourself by following these tips:
- Thoroughly clean the surface on which the ceramic covering will be installed. With a level, check that the work area is properly leveled, then draw a diagram of the areas to be paved.
- Place the ceramic tiles along the lines, leaving a space of about 1.5 mm between each one. To ensure that the level between the tiles is adequate, you can use Butech's self-leveling spacers. They make it easier to position the parts and guarantee a perfect result.
- Use the adhesive recommended in the manufacturer's instructions, and apply it with a notched trowel.
- Finally, place the ceramic piece on the ground, then position it in its final location by making light movements. Remove excess glue with a damp sponge.